

User Manual
awaBerry | Add or Update Agentic Project
Create or edit an Agentic API project by configuring credentials, target device, permission mode, and allowed folder or command access.
Add or Update Agentic Project
Summary
The Add or Update Agentic Project screen is a multi-section form for configuring an Agentic API project. A project defines a secured endpoint that allows external callers — AI agents, scripts, MCP clients, or other tools — to interact with a specific device. The form covers four areas: auto-generated project credentials, a human-readable name and description, device targeting, and the permission model (command-line or API access). When editing an existing project the form is pre-populated with its current values.
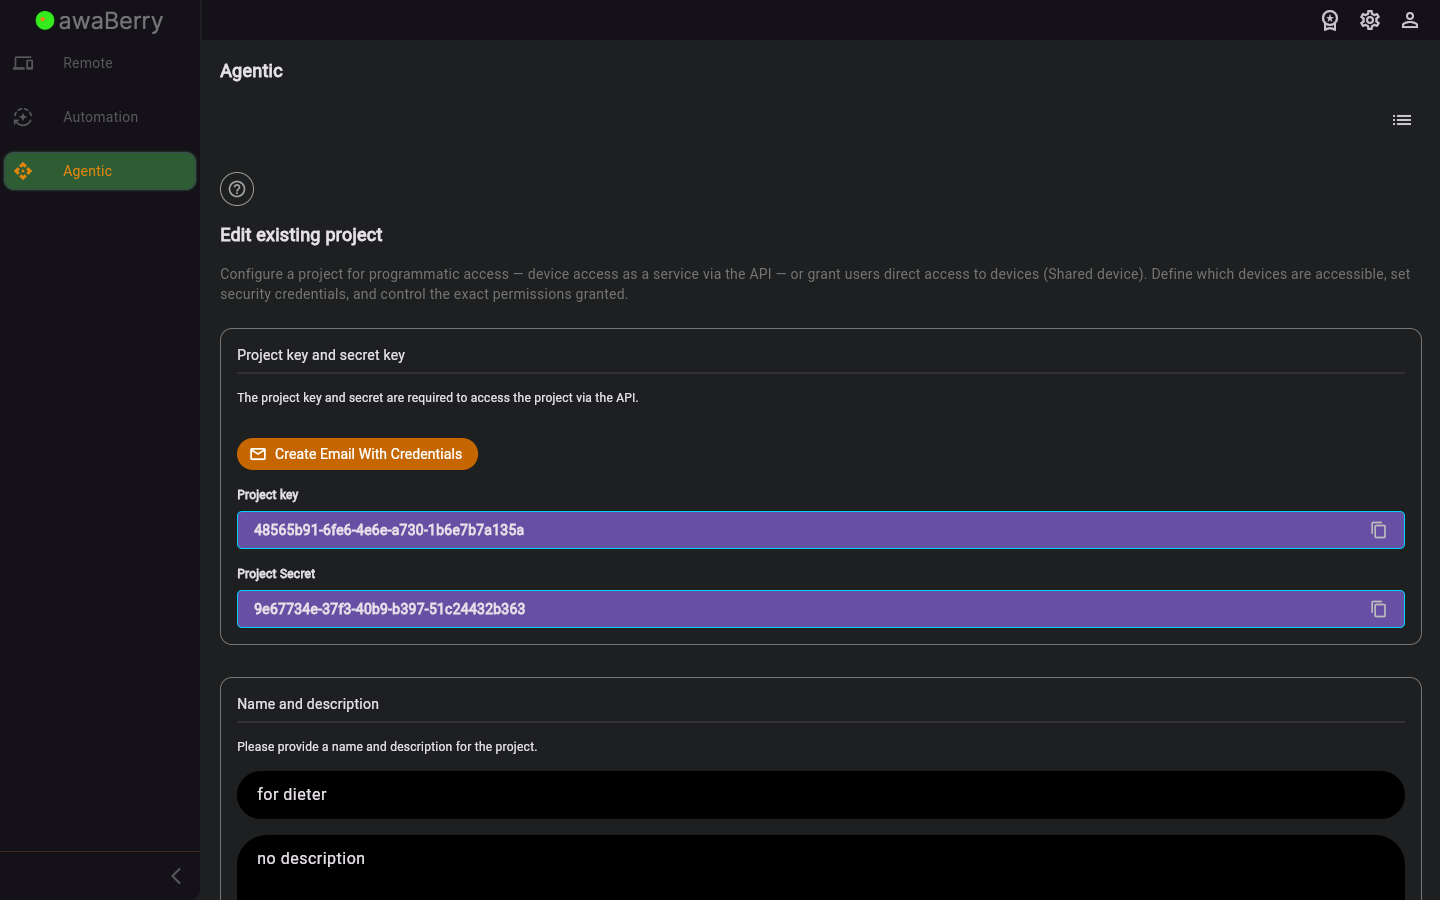
Screen on arrival
Features
Section 1 — Project Credentials
- Project Key (read-only) — the auto-generated unique key for this project; used by callers to identify the endpoint.
- Project Secret (read-only) — the auto-generated secret token; required in every API call to authenticate the caller.
Section 2 — Name & Description
- Project Name TextField — a short label identifying the project in the Projects List.
- Project Description TextField (multiline) — a longer description of what this project exposes or does.
Section 3 — Device Selection
- Device selector — choose which connected device this project targets. The project's API endpoint will execute on the selected device.
Section 4 — Permission Mode
Tap a permission mode header to activate it. The two modes are mutually exclusive.
- Allow command line access — grants terminal/SSH-style access:
- "Allow start/stop of Remote Desktop" Checkbox — permits the caller to start and stop VNC/Remote Desktop sessions on the device.
- "Allow start/stop of Web-To-Local Ports" Checkbox — permits the caller to open and close Web-To-Local port tunnels.
- Allow API access — grants programmatic, scoped access:
- "Allow administrator permissions" Checkbox — grants root-level command execution (shown only when the device user is not already root).
- Folder access toggle + folder list — when enabled, restricts file operations to the listed folders. Each folder entry has:
- Folder path TextField.
- "Allow write" Checkbox — permits writing or modifying files in this folder.
- "Include subfolders" Checkbox — extends access to all sub-directories.
- Delete button to remove the folder entry.
- Add folder button — appends a new folder row to the folder list.
- Command access toggle + command list — when enabled, restricts execution to the listed shell commands. Each entry has a command TextField and a delete button.
- Add command button — appends a new command row.
Utility Actions
- "Create Email With Credentials" button — generates a pre-formatted email containing the project key, secret, and API usage instructions. Opens a scrollable dialog with a Copy Email Text To Clipboard button so the credentials can be shared easily.
- Upload JSON config (upload icon button) — imports a previously exported permission configuration JSON file to populate the permission fields.
- Download JSON config (download icon button) — exports the current permission configuration as a JSON file for backup or sharing.
Submit
- "Create project" / "Update project" ElevatedButton — saves the project to the device. The button label reflects whether a new project is being created or an existing one updated. A spinner is shown while saving.
Scenarios
Create a new project with API access and folder restrictions
- Tap + (add) from the Projects List to open this screen in create mode.
- The Project Key and Secret are already generated — note them or use the email button to share them later.
- Enter a Project Name and optional description.
- Select the target device from the device selector.
- Tap the Allow API access header to activate that permission mode.
- Enable the Folder access toggle. Tap Add folder and enter the folder path (e.g.
/home/pi/data). Check Allow write and Include subfolders if needed. - Tap Create project. The project is saved and you are returned to the Projects List.
Grant command-line access to a caller
- Open an existing project from the Projects List (pencil icon) or create a new one.
- Tap the Allow command line access header to activate that mode.
- Check Allow start/stop of Remote Desktop and/or Allow start/stop of Web-To-Local Ports as required.
- Tap Update project (or Create project).
Share project credentials via email
- Open the project (edit mode) or after creating it.
- Tap Create Email With Credentials.
- A dialog shows a formatted email containing the project key, secret, and API endpoint information.
- Tap Copy Email Text To Clipboard and paste into your email client.
Backup and restore permission configuration
- On the source project, tap the download icon to export the current permission config as a JSON file.
- On the target project (same device or another), tap the upload icon and select the exported JSON file.
- The permission fields are populated from the file. Tap Update project to apply.
